

Where to start? An introduction to your hosting account
30 Mar 2022, by Slade Baylis
Looking into how to set up your own website and email accounts can be intimidating the first time you do it. Whilst each aspect isn’t super complicated on its own, there are quite a number of moving parts that are all needed for the services to work. For example, knowing that you need to first “register a domain name” before you can “host a website” isn’t something that comes hard coded into our genetic memory!
Even after you’ve taken those first few steps, once you’ve signed up for a hosting account, knowing how to use it can be just as confusing. That’s why we’ve put together this article, which is aimed at helping our clients whom have recently signed up for a hosting plan and are looking for an explanation of how it all works.
Before we get into that though, we’ll need to do a quick rundown of what all the involved pieces are.
The four main services – Domain names, web hosting, websites, and email hosting
When you are looking to have your own website, whether it’s for your business or personal use, there are three primary services that you need. First, you need to register the domain name that you’d like to use, then you need to sign up for a web hosting plan, and once all that’s done then you can either create a website yourself or have someone else create one for you. That’s not even mentioning what’s needed to setup email on your domain either! So let’s take a look into each of these four elements.
Domain Names - Registering a domain means to lease a website address from a domain registrar. By registering the address, you are then considered its owner and are able to use it to host your own website or email accounts.
Web Hosting – Once you have your own domain, you will need to connect it to a server so that you have the ability to “host” a website or email accounts. A “web host” is a specialised web server that allows users to upload/place their own website(s) on it, which can then be accessed by visitors around the world. With a “email host”, they are similar in that they allow you to create email accounts for sending and receiving emails through your domain. In a lot of cases web hosting and email hosting are provided as a single service.
Website – Having the space available on a server to host a website isn’t by itself enough though, you also need to have a website created and placed into that hosting account. It used to be that creating a website was the sole realm of programmers, but nowadays everyday users can create their own websites through software like WordPress. With easy-to-use application installers available with most hosting accounts, even installing applications like WordPress can be done with a few clicks and barely any technical knowledge.
Email Hosting - Just like with websites, once you have connected your domain to your email hosting service, then you will need to create some email accounts to be able to send and receive emails. Different providers and types of hosting will have different processes and charges for this, so best to reach out to your own email hosting provider if you have questions about this.
A good analogy for how these services sit together is that of a physical factory. A domain name serves as the physical address that people can use to find where you are; the website/email hosting is the actual building at the location that gives you space to use; and the website and email accounts are the equipment within that building that allows everything to function.
Now that we’ve explained each of the separate services that all come together to allow you to have a website and email accounts, we’re going to go into some details about the hosting we provide. The hope here is to help remove any mystery around some of the sections within the hosting account control panel, so that our clients can better utilise them to empower their own businesses.
Web Hosting – Which hosting software do we use?
For most of the hosting accounts that we provide, we use web hosting software called cPanel – which is a specialised piece of software that can be installed onto servers to provide the ability to host many websites on a single server. Not only that, but it allows our clients to log into a simple-to-use interface, which can be used to create and manage their own websites and email accounts.
For those interested, we’ve explained what cPanel is further and why we’ve chosen to use it in our recent What are web hosting control panels and which one is the best? article.
When our clients sign up for web hosting, we send through login details to that hosting control panel, which is commonly called the cPanel dashboard. This interface can be confusing for those out there who haven’t used cPanel before, so let’s start at the beginning and first show you how to log into it.
Logging into the cPanel dashboard
When you get a hosting account with a hosting provider, generally they send you an email with a link that you can use to log in to the cPanel dashboard. Sometimes this is your domain with “/cpanel” or “:2083” on the end, and other times it will be the server’s domain name instead.
For example, here is what a cPanel URL using a customer’s domain name would like:
- https://www.exampledomain.com/cpanel
- https://www.exampledomain.com:2083
As another example, here is what a direct cPanel login URL looks like for Micron21 customers:
- https://cp-kil-m-XXX.micron21.com/cpanel
- https:// cp-kil-m-XXX.micron21.com:2083
Please note: In the direct cPanel login example above, the “XXX” would be replaced with a number that is unique to your specific website hosting server.
Once you browse to one of those pages, here is the login screen that you will see.
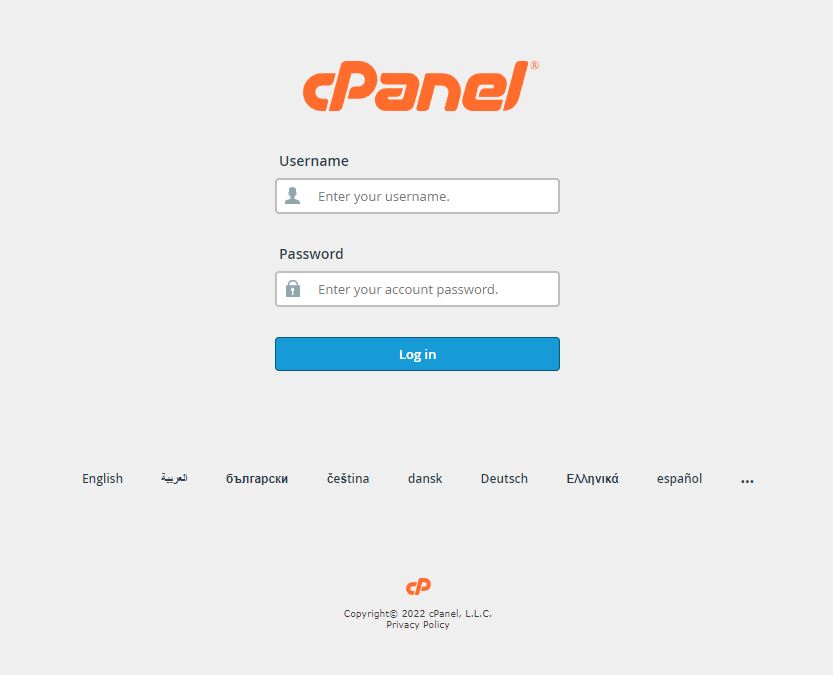
On this page you will need to enter the login details that were provided to you in that same initial email that was sent to you by your hosting provider. Once you have logged in, you will be presented with what’s known as the “cPanel Dashboard”.
Within that dashboard there are a lot of different icons that all relate to different hosting options and features - so to help guide you, next we’ll break down what each section relates to and point out the most useful features within each area.
The cPanel Dashboard – A breakdown of each sub-section
Email – How to manage your email accounts and email settings for your domain

The first section that you will usually see at the top of the cPanel dashboard is the Email section. This section allows the user quick access to all the different hosting features related in some way to emails on their domain. Users can create, remove, or manage their email accounts through the Email Accounts icon that appears here, or set up “email forwarders” through the Forwarders icon, which allows you to redirect emails sent to one address to another address entirely. In addition to that, users can configure advanced features to increase receivability of the emails they send through the Email Deliverability option.
Files – How to access and manage your websites files

This next section details all the features related to file management, backups, or setting up remote access to the files contained within your account. The key option here is the File Manager, which can be used to view and manage the files within your account - and its interface is very similar to how you access files on your own computer. Users can also use the Disk Usage feature to analyse how their files are using up the disk space within their account – this is extremely useful if they need to track down why they are using so much and then allow them to reduce it.
Other options in this section are mostly related to backups of the hosting account. This includes access to the regular backups that we provide via the Acronis Backup feature, or the ability for users to create and download their own full account backups via the Backups feature. Finally, the next most used feature here would be the FTP Accounts section, which allows our clients to set up what are known as FTP users. FTP users allow web developers to remotely access the files within your account, without providing full access to your cPanel account.
Databases – How to access and manage your websites database

With basically any complex website, a database is usually required to store information on the server. For eCommerce websites this includes client details and the information on their orders, but even simple WordPress websites require a database so that their administrators can log in and make changes. This section of cPanel is dedicated to the software and tools needed to administer those databases.
The first feature here is called phpMyAdmin and it’s usually recommended that only web developers or people already familiar with how databases function from a technical standpoint use this. As a quick introduction though, this tool allows you to directly access and modify parts of an applications database, rather than doing so through the application itself.
For other users though, the main thing they will interact with will be the MySQL Databases feature. This feature allows user to create brand new databases and database users, as well as set the access privileges of those users to the databases that exist. The database is what stores the information for an application, but a database user is what the application will use to communicate with that database.
Domains – How to host multiple domains, add redirects, or manage DNS

A hosting account would be little good without a domain name that’s connected to it - as such, you need a way to manage and administer the domains that are connected to your hosting account. This next section is entirely dedicated to that.
The Addon Domains feature allows you to have multiple websites hosted under your account, whereas via Aliases you can add domains that won’t have their own website, but may redirect to another. The Redirects feature is the one that allows you to configure those and have one domain point to another. Finally, there is the Zone Editor which allows you to manage the DNS for any of the domains connected to this account. For a explanation of that last feature, we recommend reading our recent article called Deep Dive – What is DNS?
Metrics – How to find detailed information about your hosting accounts usage

Whilst the sidebar in the cPanel Dashboard provides a lot of information about your account at a glance, at certain times you may need more detailed information about your account. The Metrics section is intended specifically for that purpose. Whether it’s providing access to errors that your website has generated, seeing rudimentary analytic information about how many people have accessed your websites, or viewing resource usage (CPU, RAM, etc) - all these are available here.
The Errors feature is what allows you to view the errors that have been generated by your websites, which can be extremely useful (especially for developers) when trying to debug an issue. The Webalizer tool give users the ability to view basic information about who has accessed your websites and what they have accessed. It’s much more rudimentary than something like Google Analytics and is much less sophisticated when it comes to detecting actual unique visitors, but it serves its purpose.
Lastly, there is the Resource Usage feature - which allows users to view their resource consumption over time to see how much their websites have used. This can be extremely useful when trying to optimise your website speed, as it can let you know whether your websites have used more resources than are available to your account. If this occurs, then a good way to improve website performance is to look at increasing those resources to match your website’s requirements.
Software – How to install commonly used software with just a few clicks

Once you have signed up for a hosting account, usually the next move is to look at uploading/placing a website on it. Within the Software section, the Softaculous Apps Installer allows you to pick from a large array of different CMS (Content Management System) platforms, such as WordPress, which can be used to build your website. Other types of applications are available too, depending on what you’re looking to achieve. With just a few clicks you can get those applications installed and be on your way to having your very own website!
The other section that is of interest here is the Select PHP Version feature. This option is mostly relevant to more technical people, but it relates to the version of PHP that is used on your account. It allows you to change the PHP version and set its options. Sometimes your website will let you know that you need to run a later version and you can change that here. Largely though, it’s usually best to leave this alone, unless you know what PHP is and what the options you are changing relate to.
Summary – A lot of information, but simpler than you might think
With so much information in this article to digest, you could be forgiven for checking out and putting it in the “too hard” basket – however, it’s all much simpler than you might think. Once you know what each section does, you won’t think twice about it and you’ll know where you need to go, no matter what you need to do.
Each area is labelled with a common sense title to make it simple to track down what you’re after. The interfaces are constantly being worked on to make them more intuitive and easier to use. Even if you can’t find exactly what you’re looking for, our support team is just a phone-call or email away.
Finally, in the Support section of our website, we also have our knowledgebase (which is continuously growing). Here, you’ll usually find the answers to the most common questions we receive – so it’s unlikely you’re the first one to have that question about how it all works!
Have more questions about cPanel or want to set up your own hosting account?
If you would like to sign up for a hosting plan with Micron21, or have any questions about how it all hangs together, reach out to our Sales team on 1300 769 972 (Option #1) or email us at sales@micron21.com.
We’re happy to have a chat about your requirements or help with any questions that you have.