How to Enable Redis Object Cache on a WordPress site
This guide covers the process of enabling Redis object caching for a cPanel user on a LiteSpeed web server. It includes enabling Redis via the LiteSpeed WHM plugin, verifying the service is running, and configuring the LiteSpeed Cache WordPress plugin to connect to it.
Prerequisites
Step 1: Navigate to Cache Redis for Users
Login to WHM as root
In the left navigation, go to LiteSpeed Web Server
Click Cache Redis for Users

Step 2: Enable Redis for the Users
Locate the cPanel username in the list
In the Service MB column, the default is 64MB. Adjust if needed.
Click the Setup Icon (Yellow Box)

It may take a bit to install. Afterward, enable the Redis service on the user by clicking the grey cog.
It should then be enabled with a green play icon

Step 3: Enable Redis Cache in LiteSpeed Cache Plugin
Login to your WordPress admin dashboard
Install LiteSpeed Cache Plugin
Navigate to LiteSpeed Cache > Cache > Object
Set the following settings and then save:
Object Cache: ON
Method: Redis
Host: /tmp/redis.sock
Port: 0
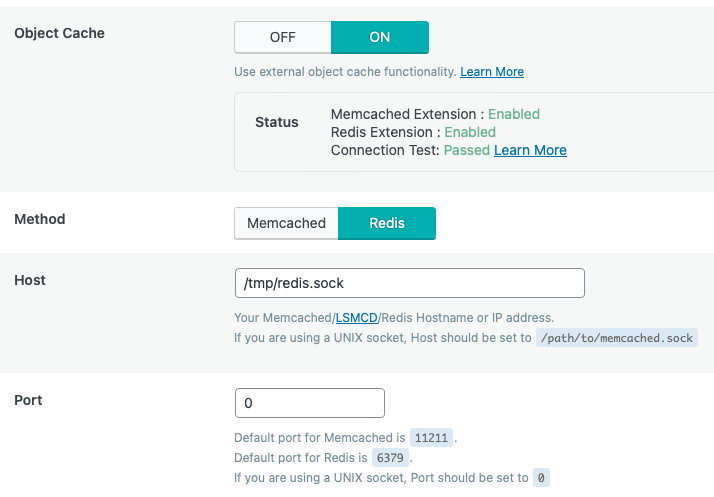
If your Redis extension does not show as enabled, make sure to enable the extension first in your PHP.
Can't find what you're looking for?
Create or manage support tickets directly with Micron21
You will need to register a new account if this is the first time lodging a ticket.
If you have previous lodged a ticket either online, email or over the phone you will already have an account. Please reset your password, if you have not logged into the support portal before.
Lodge a ticket
Manage existing tickets